30 April 2016

Installing TensorFlow 0.8 for Python 3.4 with CUDA & cuDNN 7.5 on Ubuntu 14.04 Local Machine

ProTip

Don't worry about the Nouveau conflict thing that you might heard of, NVIDIA's installer will take care of it. If you get stuck with some version conflicts, don't spend too much time to fix it. You could just reinstall Ubuntu and start from scratch within minutes, provided you have some understanding of what went wrong. Also note that we will be using latest version of everything, so we'd have to do a few intense builds.

The Essentials

Let's start by updating repos and installing essentials for NVIDIA drivers.
sudo apt-get update -y
sudo apt-get upgrade -y

sudo apt-get install -y build-essential linux-source
sudo apt-get install -y linux-source linux-headers-`uname -r`
sudo apt-get install -y linux-image-extra-virtual

Installing NVIDIA Binary Drivers

Then download the appropriate version of driver for your graphic card from NVIDIA or GeForce to your local machine.
cd ~/
wget -O ~/nvidia.run http://us.download.nvidia.com/XFree86/Linux-x86_64/361.42/NVIDIA-Linux-x86_64-361.42.run
For a cleaner install, let's remove any existing NVIDIA drivers
sudo apt-get remove --purge nvidia*
sudo apt-get autoremove
Reboot and enter Ubuntu recovery mode, activate failsafeX and then enter the terminal. Go to the download directory and change permissions to execute and run the installer.
sudo service lightdm stop
cd ~/
chmod +x nvidia.run
sudo sh nvidia.run
If it says something like "The distribution-provided pre-install script failed! Are you sure you want to continue?" Answer yes and proceed with the install.

Installing CUDA 7.5

Visit CUDA download page and get the "runfile (local)" version of the installer as other versions might not allow you to exclude driver installation. It's a 1GB+ file.
wget -O ~/cuda.run http://developer.download.nvidia.com/compute/cuda/7.5/Prod/local_installers/cuda_7.5.18_linux.run
sudo sh cuda.run
The installer will prompt for a few things, accept all except for "CUDA Driver installation" - don't accept it. We have already installed the latest version of driver in our previous step. If we accept it, it might overwrite our previous install with a different version and cause version conflicts, so don't.

Installing Miniconda

We'll be using Miniconda to manage Python 3 packages, as I had bad experience trying to get it work with default Ubuntu pip/apt-get packages.
wget -O ~/miniconda.sh https://repo.continuum.io/miniconda/Miniconda3-latest-Linux-x86_64.sh
bash ~/miniconda.sh -b -p $HOME/miniconda

export PATH="$HOME/miniconda/bin:$PATH"
Let's create a virtual environment specifically for tensorflow in Miniconda conda and install necessary packages.
conda create -n tensorflow python=3.5
source activate tensorflow
conda install python=3.5 pip numpy -y
If you're getting errors that there's no conda available, exit the terminal and try again.

Installing cuDNN 7.5

Now NVIDIA doesn't allow us to directly download cuDNN (wget) to our machine from their site, you'll get Access Denied if you tried to do so. So we will have to download cuDNN from the browser and move it our working directory. On the download page NVIDIA will ask you to fill up a survery, it's not compulsory - just click the "Proceed To Downloads" button if you are not in a good state of mind to answer a survey rationally, at this point. Just extract the file and move the contents to /usr/local.
mv ~/Downloads/cudnn-7.5-linux-x64-v5.0-rc.tgz /tmp
cd /tmp
tar -xzf cudnn-7.5-linux-x64-v5.0-rc.tgz
sudo cp /tmp/cuda/lib64/* /usr/local/cuda/lib64
sudo cp /tmp/cuda/include/* /usr/local/cuda/include

Installing Java 8

Latest version of Bazel requires Java 8 but as of now sudo apt-get install openjdk-8-jdk doesn't seem to lead nowhere. So we will have to get it from some private package.
sudo add-apt-repository ppa:openjdk-r/ppa
sudo apt-get update
sudo apt-get install -y openjdk-8-jdk
Now we have to change default Java version to the latest one we've just installed.
sudo update-alternatives --config java
sudo update-alternatives --config javac
Select the latest Java version from the list, usually it's the option #2.
  Selection    Path                                            Priority   Status
------------------------------------------------------------
  0 /usr/lib/jvm/java-7-openjdk-amd64/jre/bin/java   1071      auto mode
  1 /usr/lib/jvm/java-7-openjdk-amd64/jre/bin/java   1071      manual mode
* 2 /usr/lib/jvm/java-8-openjdk-amd64/jre/bin/java   1069      manual

Installing Bazel

Bazel is Google's own build tool that will help us compile TensorFlow. Should be straight forward, but be cautious of the permission issues.
cd /tmp
git clone https://github.com/bazelbuild/bazel.git
cd bazel
./compile.sh
sudo cp /tmp/bazel/output/bazel /usr/bin


export LD_LIBRARY_PATH="$LD_LIBRARY_PATH:/usr/local/cuda/lib64"
export CUDA_HOME=/usr/local/cuda
For some reasons, if you're getting the following error
JDK version (1.7) is lower than 1.8, please set $JAVA_HOME.
you can try to explicitly specify the Java path by
export JAVA_HOME=/usr/lib/jvm/java-8-openjdk-amd64/

Installing TensorFlow

Finally let's compile and install TensorFlow. This might take a while to finish.
cd /tmp
git clone --recurse-submodules https://github.com/tensorflow/tensorflow
cd tensorflow
TF_UNOFFICIAL_SETTING=1 ./configure
Except for the one below, leave everything to their defaults. As message mentions, visit the NVIDIA page check your graphic card's "Compute Capability" value. For instance, according to the page, my GTX 970's value is 5.2, so specify it accordingly. Better not to accept the default.
Please specify a list of comma-separated Cuda compute capabilities you want to build with.
You can find the compute capability of your device at: https://developer.nvidia.com/cuda-gpus.
Please note that each additional compute capability significantly increases your build time and binary size.
[Default is: "3.5,5.2"]: 5.2
Now let the waiting game begin (and hopefully you won't run into disk space issues).
bazel build -c opt --config=cuda //tensorflow/cc:tutorials_example_trainer

bazel build -c opt --config=cuda //tensorflow/tools/pip_package:build_pip_package
bazel-bin/tensorflow/tools/pip_package/build_pip_package /tmp/tensorflow_pkg
Now that we have successfully build the .whl file, let install it via pip. Change directory to the output folder and look for the file name, in my case it was tensorflow-0.8.0rc0-py3-none-any.whl.
cd /tmp/tensorflow_pkg/

ls

pip install --upgrade /tmp/tensorflow_pkg/tensorflow-0.8.0rc0-py3-none-any.whl
Now let's check if everything is working fine.
cd /tmp/tensorflow/tensorflow/models/image/cifar10/
python cifar10_multi_gpu_train.py

Note

Everytime you want to use tensorflow you have activate the environment by
source activate tensorflow
#(tensorflow)$  # Your prompt should change.
When you are done using TensorFlow, deactivate the environment.
source deactivate
I hope you find this useful and helped you save a couple of hours. Please leave me a message if there's any issues.

Troubleshooting

When you're testing TensorFlow, if it says that there's no GPU, try installing linux headers again by
apt-get install linux-headers-$(uname -r)
Also do the same if you're getting any of the errors below:
cat /proc/driver/nvidia/version
cat: /proc/driver/nvidia/version: No such file or directory

sudo nvidia-modprobe
modprobe: ERROR: ../libkmod/libkmod-module.c:809 kmod_module_insert_module() could not find module by name='nvidia_352'
modprobe: ERROR: could not insert 'nvidia_352': Function not implemented
If you're still having issues with NVIDIA drive, please refer to NVIDIA's Documentation
Every time after you restart the machine, you'll have to update the env variables.
export PATH="$HOME/miniconda/bin:$PATH"
export LD_LIBRARY_PATH="$LD_LIBRARY_PATH:/usr/local/cuda/lib64"
export CUDA_HOME=/usr/local/cuda
export JAVA_HOME=/usr/lib/jvm/java-8-openjdk-amd64/
Or you can permanently add it to ~/.bashrc
echo "export PATH=$HOME/miniconda/bin:$PATH" >> ~/.bashrc
echo "export LD_LIBRARY_PATH=$LD_LIBRARY_PATH:/usr/local/cuda/lib64" >> ~/.bashrc
echo "export CUDA_HOME=/usr/local/cuda" >> ~/.bashrc
echo "export JAVA_HOME=/usr/lib/jvm/java-8-openjdk-amd64/" >> ~/.bashrc
If you want to check version of the NVIDIA driver installed, you can try any of the following:
lspci -nnk | grep -iA2 vga 
lspci | grep -i nvidia
dpkg -l | grep nvidia
dpkg -l | grep ii | grep -i nvidia
nvidia-settings -q NvidiaDriverVersion

References

  • http://docs.nvidia.com/cuda/cuda-getting-started-guide-for-linux/
  • https://help.ubuntu.com/community/NvidiaManual
  • https://help.ubuntu.com/community/BinaryDriverHowto/Nvidia
  • http://ubuntuforums.org/showthread.php?t=2081649
  • http://conda.pydata.org/docs/help/silent.html
  • http://developer.download.nvidia.com/compute/machine-learning/cudnn/secure/v5/rc/cudnn_install.txt?autho=1461438353_9d110e75f21326804dcc3b7194b8c689&file=cudnn_install.txt
  • https://github.com/tensorflow/tensorflow/issues/1158
  • https://www.tensorflow.org/get_started
  • https://devtalk.nvidia.com/default/topic/920308/how-to-install-cuda-7-5-with-the-newest-nvidia-driver-361-28-/
  • https://devtalk.nvidia.com/default/topic/884586/linux/failed-to-install-cuda-7-5-in-ubuntu-14-04-lts/

22 April 2016

Installing TensorFlow 0.8 for Python 3.4 with CUDA & cuDNN 7.5 on Ubuntu 14.04 AWS GPU Instance

Last week Google announced TensorFlow 0.8 with added distributed computing support and I had a hard time trying to get it compile on AWS g2.2xlarge. So I'm writing this post in hope to save some poor souls from hours of misery. This can easily take about 30-40 minutes of your time and that's if you don't run into errors after errors. As we'll have to install a shaky stack of softwares that are depended. Also note that we will be using latest version of everything, so we'd have to do a few intense builds.
  • Build essentials
  • Miniconda 3 (or Anaconda)
  • Python 3 with pip, numpy, wheel, six etc
  • CUDA Toolkit 7.5
  • cuDNN Toolkit 7.5
  • Java 8
  • Bazel
  • TensorFlow 0.8

ProTip

I'll recommend installing everything from the default ubuntu account unless specificied otherwise (sudo) as I ran into tons of permission issues, especially with Bazel. And also when creating the AWS EC2 instance increase the disk size from 8 GB to something around 25-30, as you *will* run out of space otherwise. Consider using Miniconda to manage Python 3 packages as I wasted a lots of time trying to get it work with Ubuntu pip/apt-get packages. The default pip/apt-get installs work out fine for Python 2 packages but not for Python 3. Dependencies.

Installing various packages

This is probably the easiest part, update the repo and install everything we need, installed directly.
sudo apt-get update
sudo apt-get upgrade -y
sudo apt-get install -y build-essential git swig default-jdk zip zlib1g-dev
Ubuntu installs Nouveau by default and it seems to have some conflicts when we're trying to install NVIDIA. So we will blacklist Nouveau drivers.
echo -e "blacklist nouveau\nblacklist lbm-nouveau\noptions nouveau modeset=0\nalias nouveau off\nalias lbm-nouveau off\n" | sudo tee /etc/modprobe.d/blacklist-nouveau.conf
echo options nouveau modeset=0 | sudo tee -a /etc/modprobe.d/nouveau-kms.conf
sudo update-initramfs -u
You can refer to the Ubuntu Manual if you run into any troubles at this point. Now we're going to install extra drivers were that left out of the base kernel package and required by the NVIDIA drivers.
sudo apt-get install -y linux-image-extra-virtual
You might want to sudo reboot now to stay on the safe side. Next up, we'll install latest linux headers for the NVIDIA drivers.
sudo apt-get install -y linux-source linux-headers-`uname -r`
If you're getting some local language warning messages, you can fix it by switching back to US English.
export LANGUAGE="en_US.UTF-8"
export LANG="en_US.UTF-8"
export LC_ALL="en_US.UTF-8"
locale-gen "en_US.UTF-8"
sudo dpkg-reconfigure locales
Before moving to the next section, another sudo reboot would be recommendable.

Installing Miniconda

We will install Miniconda to manage Python 3 packages
wget -O ~/miniconda.sh https://repo.continuum.io/miniconda/Miniconda3-latest-Linux-x86_64.sh
bash ~/miniconda.sh -b -p $HOME/miniconda

export PATH="$HOME/miniconda/bin:$PATH"
We will now install pip numpy packages via Miniconda (conda).
conda install python=3.4 pip numpy -y
If you're getting errors that there's no conda available, exit the terminal and try again or better yet sudo reboot if you haven't already.

Mounting Root

To make sure that we don't run out of space when building TensorFlow via Bazel, we are you going to mount the root. Also *don't* place anything important on /mnt as it will not be saved when building an AMI.
sudo mkdir /mnt/tmp
sudo chmod 777 /mnt/tmp
sudo rm -rf /tmp
sudo ln -s /mnt/tmp /tmp

Installing CUDA 7.5

Visit CUDA download page and get the "getdeb (network)" version of the installer, other versions might work but I haven't tested them.
cd /mnt/tmp
wget http://developer.download.nvidia.com/compute/cuda/repos/ubuntu1404/x86_64/cuda-repo-ubuntu1404_7.5-18_amd64.deb
sudo dpkg -i cuda-repo-ubuntu1404_7.5-18_amd64.deb
sudo apt-get update
sudo apt-get install -y cuda
sudo modprobe nvidia

Installing cuDNN 7.5

Now NVIDIA doesn't allow us to directly download cuDNN to our machine from their site, you'll get Access Denied if you tried to do so. So we will have to download cuDNN from the browser and upload it to Dropbox/Google Drive or somewhere else online. On the download page NVIDIA will ask you to fill up a survery, it's not compulsory - just click the "Proceed To Downloads" button if you are not in a good state of mind to answer a survey rationally, at this point. Upload the file somewhere, get direct link to it and replace DROPBOX/GDRIVE_CUDNN_DOWNLOAD_LINK with it.
cd /mnt/tmp
wget -O "cudnn-7.5-linux-x64-v5.0-rc.tgz" "DROPBOX/GDRIVE_CUDNN_DOWNLOAD_LINK"
tar -xzf cudnn-7.5-linux-x64-v5.0-rc.tgz
sudo cp /mnt/tmp/cuda/lib64/* /usr/local/cuda/lib64
sudo cp /mnt/tmp/cuda/include/* /usr/local/cuda/include

Installing Java 8

Latest version of Bazel requires Java 8 but as of now sudo apt-get install openjdk-8-jdk doesn't seem to lead nowhere. So we will have to get it from some private package.
sudo add-apt-repository ppa:openjdk-r/ppa
sudo apt-get update
sudo apt-get install -y openjdk-8-jdk
Now we have to change default Java version to the latest one we've just installed.
sudo update-alternatives --config java
sudo update-alternatives --config javac
Now select the latest Java version from the list, usually it's the option #2.
  Selection    Path                                            Priority   Status
------------------------------------------------------------
  0 /usr/lib/jvm/java-7-openjdk-amd64/jre/bin/java   1071      auto mode
  1 /usr/lib/jvm/java-7-openjdk-amd64/jre/bin/java   1071      manual mode
* 2 /usr/lib/jvm/java-8-openjdk-amd64/jre/bin/java   1069      manual

Installing Bazel

Bazel is Google's own build tool that will help us compile TensorFlow. Should be straight forward, but be cautious of the permission issues.
cd /mnt/tmp
git clone https://github.com/bazelbuild/bazel.git
cd bazel
./compile.sh
sudo cp /mnt/tmp/bazel/output/bazel /usr/bin


export LD_LIBRARY_PATH="$LD_LIBRARY_PATH:/usr/local/cuda/lib64"
export CUDA_HOME=/usr/local/cuda
For some reasons, if you're getting the following error
JDK version (1.7) is lower than 1.8, please set $JAVA_HOME.
you can try to explicitly specify the Java path by
export JAVA_HOME=/usr/lib/jvm/java-8-openjdk-amd64/

Installing TensorFlow

Finally let's compile and install TensorFlow. This might take a while to finish.
cd /mnt/tmp
git clone --recurse-submodules https://github.com/tensorflow/tensorflow
cd tensorflow
TF_UNOFFICIAL_SETTING=1 ./configure
Except for the one below, leave everything to their defaults. AWS requires CUDA version of 3.0, so we'll specify it here adequately. Don't accept the default.
Please specify a list of comma-separated Cuda compute capabilities you want to build with.
You can find the compute capability of your device at: https://developer.nvidia.com/cuda-gpus.
Please note that each additional compute capability significantly increases your build time and binary size.
[Default is: "3.5,5.2"]: 3.0
Now let the waiting game begin (and hopefully you won't run into disk space issues).
bazel build -c opt --config=cuda //tensorflow/cc:tutorials_example_trainer

bazel build -c opt --config=cuda //tensorflow/tools/pip_package:build_pip_package
bazel-bin/tensorflow/tools/pip_package/build_pip_package /tmp/tensorflow_pkg

pip install --upgrade /tmp/tensorflow_pkg/*.whl
Now let's check if everything is working fine.
cd /mnt/tmp/tensorflow/tensorflow/models/image/cifar10/
python cifar10_multi_gpu_train.py
I hope you find this useful and helped you save a couple of hours. Please leave me a message if there's any issues.

Troubleshooting

When you're testing TensorFlow, if it says that there's no GPU, try installing linux headers again by
apt-get install linux-headers-$(uname -r)
Also do the same if you're getting any of the errors below:
cat /proc/driver/nvidia/version
cat: /proc/driver/nvidia/version: No such file or directory

sudo nvidia-modprobe
modprobe: ERROR: ../libkmod/libkmod-module.c:809 kmod_module_insert_module() could not find module by name='nvidia_352'
modprobe: ERROR: could not insert 'nvidia_352': Function not implemented
If you're still having issues with NVIDIA drive, please refer to NVIDIA's Documentation
Every time after you restart the machine, you'll have to update the env variables.
export PATH="$HOME/miniconda/bin:$PATH"
export LD_LIBRARY_PATH="$LD_LIBRARY_PATH:/usr/local/cuda/lib64"
export CUDA_HOME=/usr/local/cuda
#export JAVA_HOME=/usr/lib/jvm/java-8-openjdk-amd64/ #you might not need this
Or you can permanently add it to ~/.bashrc
echo "export PATH=$HOME/miniconda/bin:$PATH" >> ~/.bashrc
echo "export LD_LIBRARY_PATH=$LD_LIBRARY_PATH:/usr/local/cuda/lib64" >> ~/.bashrc
echo "export CUDA_HOME=/usr/local/cuda" >> ~/.bashrc
#echo "export JAVA_HOME=/usr/lib/jvm/java-8-openjdk-amd64/" >> ~/.bashrc #you might not need this
If you didn't increase disk size from default 8GB and run out of space, you can try something alone these lines but at this point I'd rather restart the whole process again.
#mv ~/.cache /mnt/tmp
#ln -s /mnt/tmp/.cache ~/
#sudo chown -R ubuntu:ubuntu ~/.cache/bazel/
#rm -rf /home/ubuntu/.cache

References

  • http://docs.nvidia.com/cuda/cuda-getting-started-guide-for-linux/
  • http://conda.pydata.org/docs/help/silent.html
  • http://developer.download.nvidia.com/compute/machine-learning/cudnn/secure/v5/rc/cudnn_install.txt?autho=1461438353_9d110e75f21326804dcc3b7194b8c689&file=cudnn_install.txt
  • https://www.tensorflow.org/get_started
  • https://devtalk.nvidia.com/default/topic/920308/how-to-install-cuda-7-5-with-the-newest-nvidia-driver-361-28-/
  • https://devtalk.nvidia.com/default/topic/884586/linux/failed-to-install-cuda-7-5-in-ubuntu-14-04-lts/

06 March 2016

How to fix slow SSD performance on Windows 10

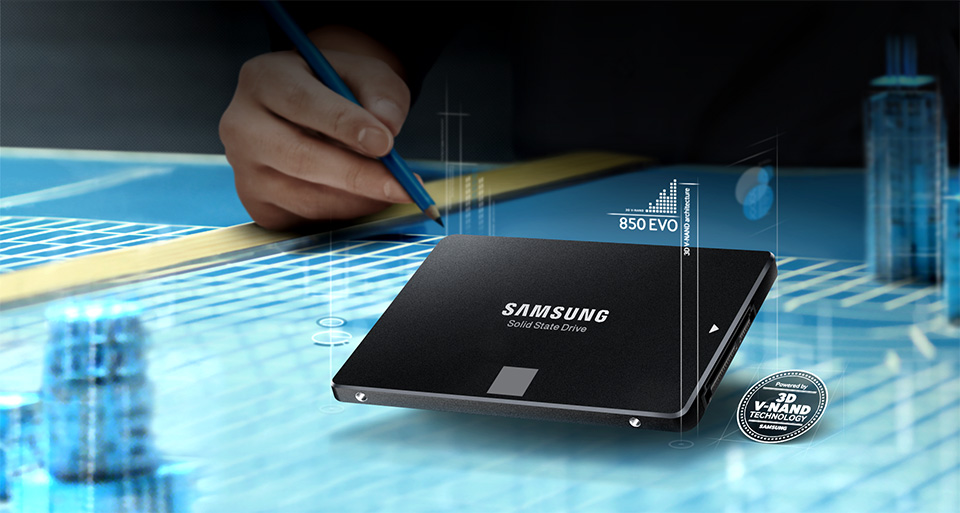
So I ran Crystal Disk benchmark on my Samsung 850 EVO SSD and it was crawling like a boneless snail. After some googling, I realized my Windows 10 was still running on IDE mode and all we have to do is change it to AHCI, which is basically a faster mode of operation than the legacy IDE. To do that:
  1. Right click the Start Menu/Windows icon (on the left bottom of your screen)
  2. Choose Command Prompt (Admin) option from the menu
  3. Type the following command and press Enter to boot Windows on Safe Mode
    bcdedit /set {current} safeboot minimal
  4. Restart the computer
  5. Enter your BIOS during boot up (by pressing DEL, F2 or F10 key - depending on your hardware)
  6. Go to "Advanced" tab and enter "SATA/Storage/HardDrive Configuration"
  7. Set the "Storage Controller" option to "AHCI" mode and if there is "Marvell Storage Controller", set it to "AHCI" as well
  8. Press "Esc" on your keyboard, then select "Save changes and exit" option
  9. If everything goes fine, Windows 10 will launch in Safe Mode and we've successfully activated AHCI
  10. Now right click the Start Menu/Windows icon and select "Command Prompt (Admin)" again
  11. Type the following command and press Enter to turn off the Safe Mode booting
    bcdedit /deletevalue {current} safeboot
  12. Restart the computer and go do your thing
:
Before (in IDE mode)

After (in AHCI mode)
And just like that we have doubled the performance of our SSD!? Well, technically this is the expected performance but since we were stuck with some legacy grandma walking stick support, it was sort of suffering to run. There are some other methods to do the same, which involves registry editing and stuff but this is a much safer method. Hope that helps.

28 February 2016

Fixing “No bootable device” error when booting ColudReady on legacy Intel motherboards

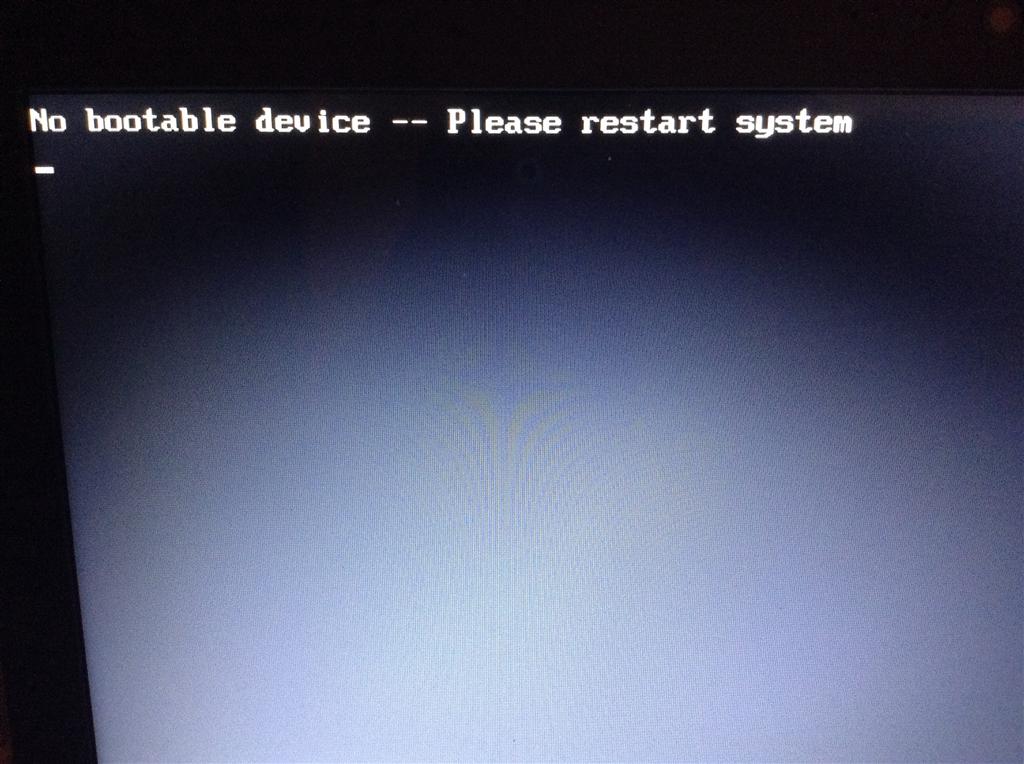
I was able to install Neverware CloudReady on my hard drive without errors, but when I plug out the installer USB and try to boot the OS, I was getting a "No bootable device -- insert boot disk and press any key" error. After tons of googling, apparently my legacy Intel Desktop Board does not support GPT well, so we'll have to manually set the Protective Master Boot Record (PMBR) flag using parted the utility.

To do this, you’ll need access to command line/terminal. You can use just about any Linux Live CDs (including Ubuntu's) but I personally went for the System Rescue CD. After installing CloudReady on your harddrive as usual, boot from the live CD and enter the following into the terminal:

parted /dev/sda disk_set pmbr_boot on
Reboot the machine and should be able to boot from your Chromium OS. I spend solid 3 days trying figure this out and my OCZ Agility 3 died in the process, hopefully you'll find this useful.